Customer Accounts: Search Accounts
-
Search Account
-
Create Search
-
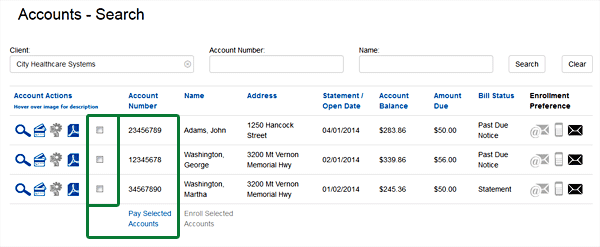
Go to Customer Accounts menu and select Search Accounts
- Select the client name (the only option in dropdown box should be your organization)
- Account Number: This is the most accurate search option for matching results
- Name: Patient’s last name is the best practice to use for this search field
- Select Search
- List should be populated below with results from the search
-
Account Actions
-
View Account Details
-
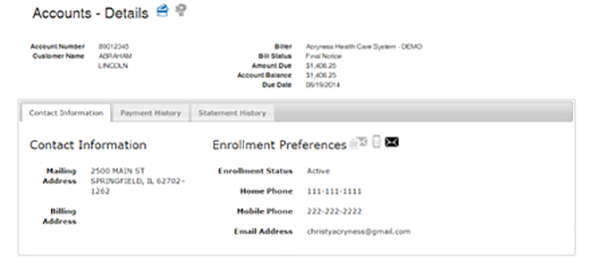
Highlight and select to view all information related to the account
-
-
-
Basic Information: Validate the general patient account information here including Mailing & Billing address, Account Balance and Amount Due.
- No information can be edited in this tab
-
Payment History: History of the payments posted for this account
- You can reverse charges in this tab by selecting
-
Statement History: History of statements related to this account
- You can view any statement in this tab by selecting
-
-
Make a Payment
-
Highlight and select to be redirected to the Make A Payment page
- Please refer to the Make A Payment section for further instruction
-
Initiate Enrollment
- Engage the Patient
- Setup eBill and edit enrolled account details
- Drive Down Costs
For more information about this product contact Acryness Support
-
View Latest Statement
-
Highlight and select to view the most recent statement produced for this account
- Pay Selected Accounts
- Mark the check box for the multiple accounts that you wish to complete with 1 transaction and click Pay Selected Accounts at the bottom of the list of results
- You will be redirected to the Make A Payment screen
- Process a Payment Now is automatically selected for you
- Users have the option to setup recurring payments if selected. Refer to instructions for this feature in the next section
- Select the payer account that is responsible for the payment
- Selection should match the card holder and billing information